If you’re renovating, make sure to protect any finished floors with a drop cloth first.
drywall compound to each joint:
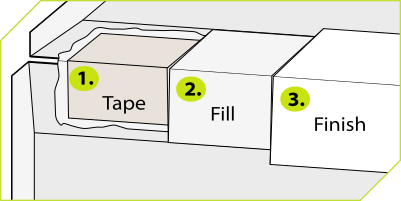
1 to apply the tape.
1 to fill the joint.
1 to finish it smooth.
If you’re renovating, make sure to protect any finished floors with a drop cloth first.
drywall compound to each joint:
1 to apply the tape.
1 to fill the joint.
1 to finish it smooth.
You can use all-purpose compound for all three coats, but if you’re doing a bigger job; using taping compound for the first 2 coats, and finishing compound for the last, will make everything go smoother.

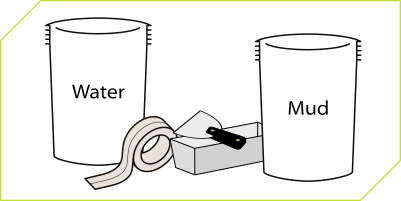
Usually premixed mud can be used straight out of the box or pail, but thinning it to about the thickness of yogurt makes the job easier.
Before you start, you’ll need Corner Finishers, and a handle, but you’ll also need:
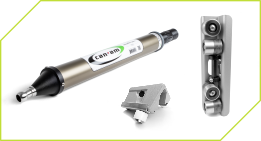
A Tube, Applicator, and Roller can also help, but aren’t essential.
Start by applying mud and tape to a reasonable number of angles – two or three if you’re not used to using corner finishers; a room or two once you’ve been doing it for a while.
A Tube works best for applying, but a knife will work just fine. You want a strip of mud, about one inch wide, on each side of joint.
Then apply tape.
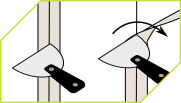
You can either pre-measure and cut your tape, or run it off the roll as you go.
Cut the tape by pinning it against the wall with the knife, and tearing across the blade.
 Pro Tip:
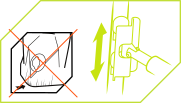
To keep your Finishers from wearing out too quick, we suggest using a Roller to embed the tape before finishing.
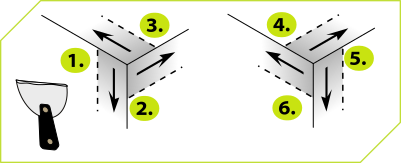
 For the first coat, it’s most common to use the 2.5″ Finisher.
Dip the front of the Corner Finisher in your compound container first. This reduces the amount of mud it takes off the angle on the first pass.
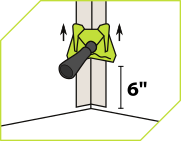 Place the Corner Finisher about 6 to 8 inches from the end of the angle to avoid catching the tape.
Applying even pressure, run the Corner Finisher smoothly along the angle, ending at the threeway.
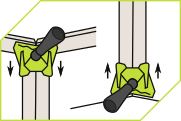
Turn the Finisher around, and run it all the way back across the joint. Repeat once or twice more, always ending the last pass at the threeway.
Repeat for all the angles you applied mud to.
 If Corner Finishers are new to you, it may take a few tries to get the right pressure.
It is always better to err on the side of not applying enough pressure than applying too much.
If you don’t push hard enough, you can always just run it over again. If you press too hard though, air may get under the tape, mud will drip everywhere, and you will likely have to remove the tape and try again.
Don’t worry if your finish isn’t perfect, especially on the first coat. It will only take a few angles to get the feel for it, and future coats will often cover any minor flaws in the taping coat.
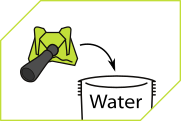
Once all your angles are taped, leave your Finisher in your cleaning water as you move to the next step.
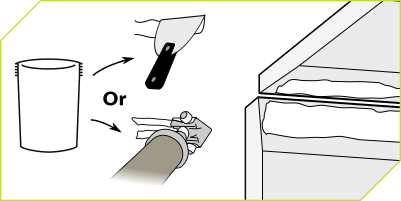
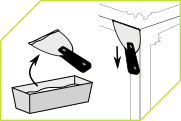
 Using the drywall knife and the pan, carefully blend out each of the three flats in the threeway, circling out from the apex, first clockwise, then counterclockwise.
(Or counterclockwise, then clockwise. Whichever you like.)
This can be the hardest step for beginners, as it requires a careful quick hand.
It helps to put a small roll of mud under the edge of the blade before you start smoothing.
 Again, don’t worry too much on the taping coat. There are two more coats to cover any imperfections.
Just do your best, and make sure not to leave any mountains to sand down.
 Last of all, use your knife to wipe any stray compound on the wall back into your pan.
Once you’ve finished smoothing all your joints, scrape up and discard any mud that fell to the floor, as you let the joints dry.

Your last two coats will work almost exactly the same as the taping coat. Just give your joints a very quick, very light sand with coarse sandpaper first, and don’t apply any tape.
After your last coat dries, use fine sandpaper to achieve a smooth finish.
For the absolute best finish, you’d want to use a 3.0″ Finisher to fill the joint, and a 3.5″ for the last coat. If you don’t have access to a 3.5″ Finisher you can get away with using the 3.0″ one for the last coat.

© 2026 Can-Am Tool.