This newsletter is available in a video format on Can-Am Tool video channel.
It certainly is a great feeling when you make a purchase and find out that you got the high-line model with all the bells and whistles, without breaking the bank. With CanAm Drywall Finishing Tools you are getting a superb product that can outlast many other brands. But to get a full life out of your purchase, a certain amount of care should be observed, including regular maintenance – after all, you wouldn’t buy a car and then never take it to the car wash, would you?
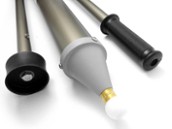
Today, I’d like to talk about basic cleaning of a CanAm Compound Applicator Tube.
Normally, cleaning is as simple as flushing clean water through the Tube by drawing water in through the cone, and pushing it out.
Sometimes, more thorough cleaning is required. After using a quick-setting compound, or if it’s been a while since the last regular cleaning and mud has been allowed to dry, mud can be hardened and caked onto some components. For these more thorough cleaning jobs, we recommend removing the end cap first with a twist-and-pull motion.
Quick Tip: If you want to keep the end cap easy to remove, a light silicone spray on the o-ring in the end cap can help.
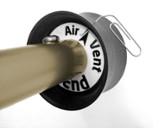
Rinse the piston with clean water, and check that the vent hole is unobstructed, inserting a small diameter pin or paper clip to clear the hole.
Run or spray clean water through the length of the Tube until traces of the compound are removed.
Quick Tip: A long-handle, soft bristle cleaning brush can help for spots that are hard to rinse.
After cleaning, dry everything off, spray lightly with silicone, and reassemble.
These simple steps for cleaning your CanAm Applicator Tube will help extend the working life for a long time! If you need to get your own CanAm Compound Tube you can shop online or visit your local dealer to find out about the sizes available!